A
s it is often the case in the history of sweetness, the origin and/or the inventor of some delicacy that is widely popular today is – unknown. Same goes for caramel.
Caramel Burns
THIS PART IS IMPORTANT, DON’T SKIP IT! Burns caused by caramel are severe and for several reasons. Liquids conduct heat better than solids, the temperature of just made caramel is between 165°C(329°F) and 190°C(374°F), which is significantly higher than the temperature of boiling water for example, and unlike water, caramel doesn’t slide of the skin, it sticks to it and the heat penetrates deep into the tissue.
How to Protect Yourself from Caramel Burns
- Always keep on hand one bowl filled with cold water and ice cubes. In case you touch your caramel by accident, submerge your hand in that bowl immediately.
- Wear your oven mits to protect your hands, especially if you are a beginner.
- Wear a shirt with long sleeves, if caramel splatters, your forearms will be protected, too.
- If you have glasses put them on and protect your eyes.
- Always make your caramel in a large pan. If you have to add cream of something else to the hot caramel, that will create lots of hot steam and the caramel will rapidly rise inside the saucepan. If the saucepan is large enough, the mixture won’t overflow.
- Don’t leave your caramel unattended, not even for a second. If it overcooks, it will become black, non edible and it will start burning and smoking which could activate your smoke detector.
- Make sure not to splatter your hot caramel with cold water or any other cold liquid, as it will cause violent reaction.
- When cooking caramel, keep children and pets away from the kitchen.
The History of Caramel
Some sources claim that Arabs invented some kind of crunchy caramel in 11th century by crystallizing sugar and water. That shouldn’t be surprising if we know that in 7th century in Persia the art of growing sugar cane and making sugar was well-developed and that they established sugar production in other lands that they conquered, including North Africa and Spain. However, sugar wasn’t discovered by the rest of Western Europe until 11th century, as a result of the Crusades. In England, first sugar was recorded in 1099, but the price of this commodity was outrageous – it was sold at two shillings a pound, and this would be about 100$ US per kilo at today’s prices! It was very much a luxury item! Now, even the etymology of the word caramel is ambiguous – it looks that the English word comes from French caramel, borrowed from Spanish caramelo. Most likely that comes from Late Latin calamellus which means ‘sugar cane’. Less likely, it comes from a Medieval Latin cannamella, from canna ‘cane’ + mella ‘honey’. Finally, some dictionaries connect it to an Arabic kora-mokhalla which means ‘ball of sweet’. Caramel, naturally have crossed the ocean with first american settlers, so it is recorded that arround 1650 they were making some type of hard candies in the kettles. Fast forward to modern history – the most important historical figures in the world of caramel in US were Milton Hershey, August Goetze and Emil Brach.
Two Methods of Making Caramel
It works great with chocolate, even better with nuts, oranges, pears, bananas or apples, and true fans eat it bare! At first glance, making this irresistible treat appears easy – it is only melted sugar, right? On the contrary! Believe it or not, this delight causes unbearable headaches to numerous enthusiasts! How so? What’s the catch?
Dry Caramel
Putting granulated sugar directly into a saucepan, and heating it until the crystals melt, and the liquid becomes golden colored is dry caramel method. This technique requires your undivided attention because sugar usually dissolves and darkens unevenly. It is likely that you will get lumps of undissolved sugar; while on the other hand, the rest of the sugar could easily burn. The cause can be in the pan which doesn’t conduct heat uniformly, or the problem could be in the heat source itself. If you, despite these challenges, prefer making dry caramel, I recommend using a large pan, where you can put sugar in thin, even layer – that will help you in making perfect caramel.
Wet Caramel
Mix granulated sugar with some water. How much water? Put just enough water to make all the sugar wet; you don’t want any areas of dry sugar crystals in your pan. Water partially dissolves sugar creating sugar syrup and helping to balance the heat distribution in the mixture. If you want to learn more about all the stages of sugar syrup before it turns into caramel, check my post about cooking sugar syrup. Using this method for making caramel takes more time, however prolonged cooking develops more complex taste of caramel.
Let me remind you of couple of important steps of cooking sugar syrup:
- Put sugar and water into a saucepan and stir well so all the sugar gets wet and the syrup can cook evenly.
- Get rid of the sugar crystals from the sides of your saucepan by brushing them with a brush dipped in cold water. You can also put a lid on your saucepan and wait until the syrup boils. The steam will wash the sides of the pan, and then you can remove the lid.
- Once your syrup starts boiling, don’t stir it any more. If, at some point the syrup starts caramelizing unevenly, you can gently swirl the saucepan to even the color of your caramel.
- When your caramel is done, use it immediately because as it cools it will harden and become darker and darker. You can also stop the darkening by submerging the bottom of your saucepan in iced water, but that will speed up the cooling and hardening.
Types of Caramel
How do you know that your caramel is done? That is the question! Well, depends on what do you want to do with it when it’s done! I’m bringing you a little guide from my “Le Grande Larousse Gastronomique” – the bible of coking and baking, where there are no less than FIVE stages of caramel!
Very Light Caramel (Caramel Très Claire)
Almost white in color, this type of caramel is used for glazing petits fours and dried fruits filled with marzipan (fruits déguisés). To make very light caramel, you should stop cooking sugar syrup once it starts becoming yellow at the edges of the saucepan.
Blond Caramel (Caramel Blond)
Blond caramel is golden yellow in color, and it is used for making choux caramel, dipping citrus peel, gluing two pieces of meringue or assembling sugar pieces (pièces montées).
Medium Caramel (Caramel Moyen)
Medium caramel is still light, usually used for lining molds for crème caramel, for making nougatine (not nougat), or making a glaze for creams and cakes, or sauce for ice cream.
Mahogany Caramel (Caramel Éteint)
Mahogany caramel is, in my opinion, the best choice for making soft caramel and caramel sauce, because it has more complex flavor, it is not as sweet as the lighter ones, and the color is divine, even when diluted with cream and butter!
Brown Caramel (Caramel Brun)
Bown caramel is rather dark – amber brown, and it is used for coloring consommés (soups), sauces and stews (ragoûts). After this stage, at 190°C (374°F) sugar burns and becomes unusable.
Caramel Troubleshooting – What Can Go Wrong?
The biggest and the most annoying obstacle of cooking caramel is recrystallization of sugar crystals, and that means that, instead of beautiful golden liquid, you get pale, sandy mixture full of crystals in your pan. That misfortune might happen when your sugar syrup splashes the sides of your pan, and some undissolved sugar crystals stay there while the rest of the syrup is cooking. If some of those undissolved crystals get in contact with cooked caramel, that will initiate chain reaction of recrystallization and turn your liquid gold into an opaque, sandy mess. However, it is possible to prevent crystallization in several ways:
- While the syrup is cooking, take a brush, dip it in cold water, and wash down the crystals from the sides of the pan.
If you don’t have a brush put a lid on the pan until the syrup boils. If there are any crystals on the sides of the pan, the steam will wash them down. After that, remove the lid so water can evaporate freely. - You can prevent crystallization by adding some glucose syrup or invert sugar into your sugar syrup, or by adding a small amount of acid – lemon juice or vinegar. The acid will break sucrose molecule into its components – glucose and fructose.
- When your syrup starts boiling stop stirring! If you want to even the color of your caramel, gently swirl the pan.
- When you make your perfect caramel, if you want to add something like cream or nuts, make sure that anything you wish to add, you warm up first. I like to bring the cream just to a boil and pour it into hot caramel immediately. If I am making caramelized nuts, I put them in the oven at 170°C(338°F) for 10 minutes first. If you add cold cream or nuts to just made, hot caramel, you will expose it to a temperature shock, which can also initiate recrystallization.
- Choose proper pan. Don’t use dark colored pan because you won’t be able to see the color of caramel, and you could overcook it easily. I recommend stainless steel or, even better, copper saucepan (if you can afford one). Both materials conduct heat well, and don’t react with food.
What to Make out of Caramel?
- As soon as your caramel is nicely browned and still hot, pour it into your ramekins carefully to make crème caramel.
- Add some hot cream and butter and make your own soft caramels! Even better, pop some chololate into the mixture too, sprinkle with fleur de sel, and make some delicious chocolate salted caramels!
- If you are in the mood for making some more elaborate desserts, roll up your sleeves and make soft caramel and chocolate ganache tarts, your effort will be rewarded generously!
- Amaze your family and guests with beautiful caramel decorations which will make your dessert outstanding!
How to Make Caramel Decorations
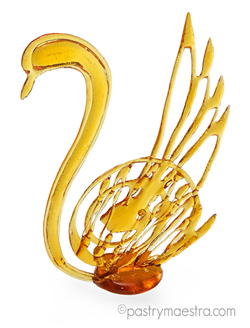
When your perfect, carefully made caramel cools down, if you don’t add anything to it, all you get is an amber colored slab! Yes, beautiful, transparent, colorful, but – still a slab. So, if you don’t like to eat it like that – au naturel, here’s how you can have a lot of fun with your caramel!
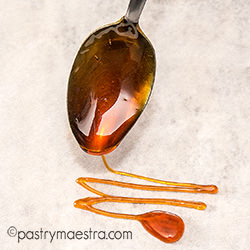
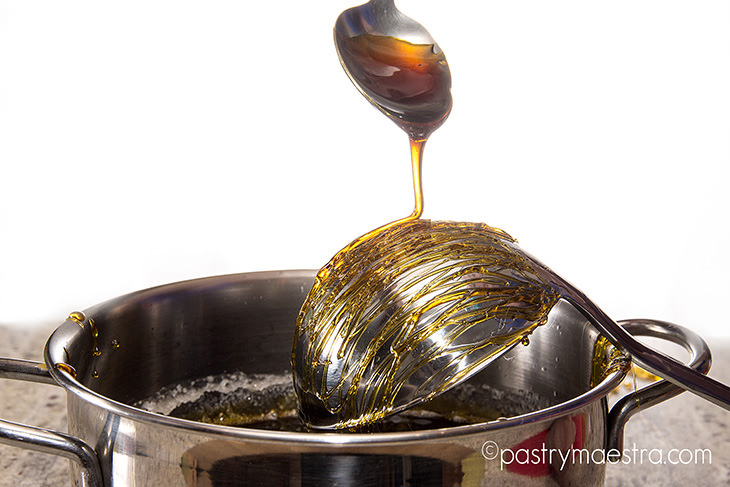
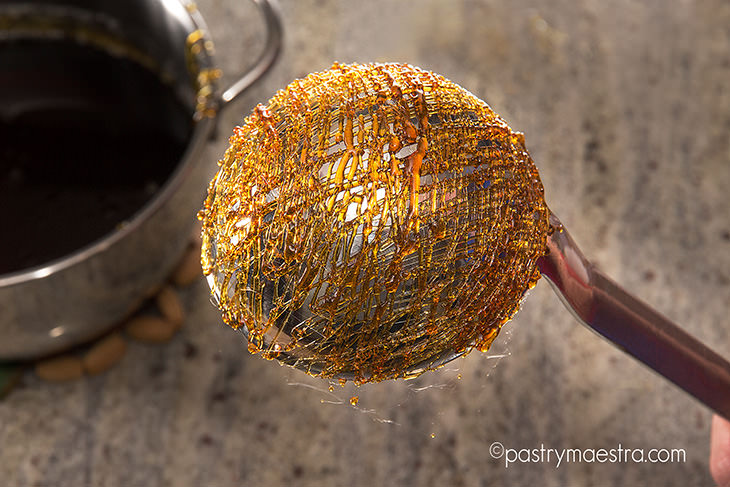
Caramel can be formed in different shapes. While it is still hot, it can be poured with a spoon onto a silicone mat or parchment paper into various shapes. It can even be piped with a cornet, but be careful, use gloves to avoid burns! When it cools and gets a bit thicker, it can be drizzled over a ladle to make a caramel cage, and when it gets even denser, it can be threaded into a spun sugar.
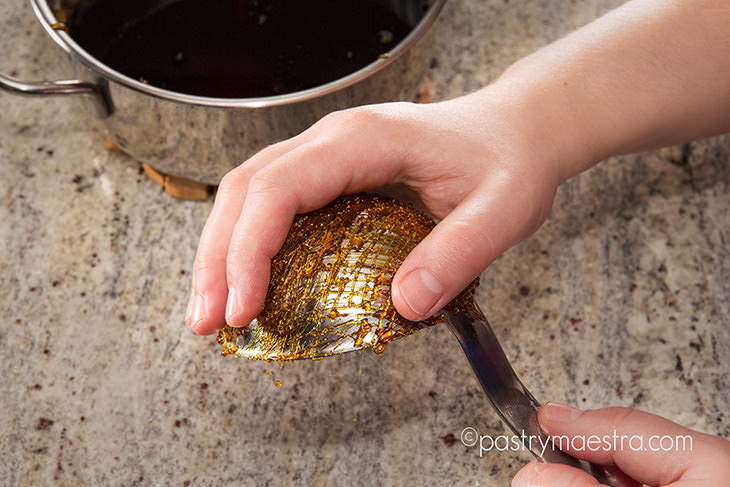
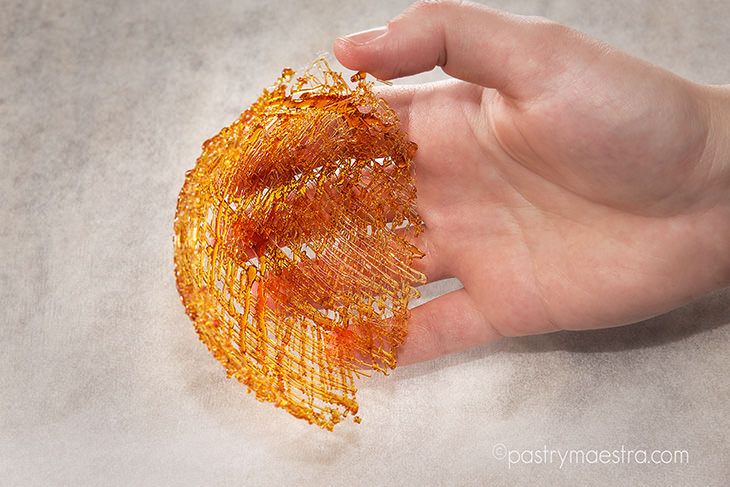
If you want to save your fragile caramel decorations for later, don’t put them in the refrigerator! The moisture will melt the caramel. Gently put your caramel art in a box, add a few packets of silica gel – the dehumidifier, and pray for the best. If you don’t live in humid climate, it could last for a day or two, well sealed, of course.
Or you can simply put your caramel decoration on a dessert and enjoy in drawing countless ‘oohs’ and ‘aahs’ from your flabbergasted guests!
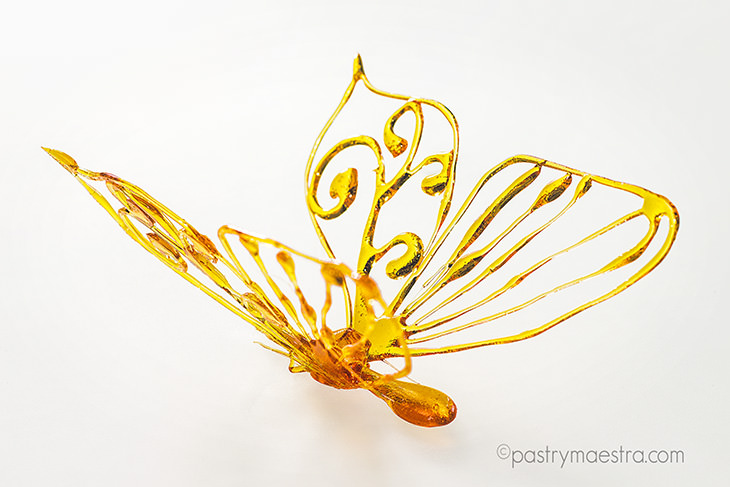
When you overcome all the hurdles, the only thing left to do is wait patiently until caramel cools down and enjoy this treat! It is fascinating that from one ingredient only, that ordinary, plain white sugar, you can get golden, amber liquid that contains wide spectrum of flavors – from acid, through bitter, to its original sweet taste. And all that, only by heating! So, let your imagination fly and – create!


