D
id you like playing with modeling clay when you were a kid? Well, playing with rolled fondant will be even better because you can eat your creations! And how fantastic is that? Not only that you can just eat it, but you can color it in any color you can think of, and make beautiful edible decorations for your cake. But, first things first – do you actually know what is rolled fondant?
What is Rolled Fondant?
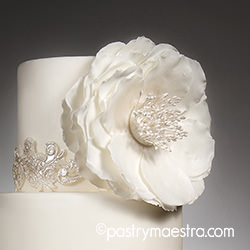
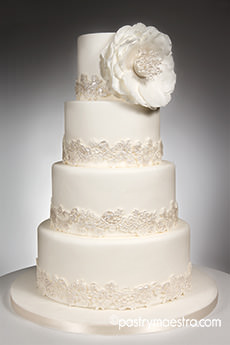
Rolled fondant is a dough-like mixture that contains sugar, glucose, and some stabilizers, and it is used for making decorations and covering cakes to obtain a smooth and even finish. Before working with fondant, it is necessary to knead it first. That way you obtain smooth and pliable mass. Fondant will dry out when exposed to air, so it should be kept in a plastic bag or wrapped in plastic foil.
Fondant Icing vs. Rolled Fondant
Fondant icing or poured fondant isn’t the same thing like rolled fondant! Fondant icing is pure white icing made by cooking sugar syrup to a certain temperature, cooling it down and then mixing it until it re-crystallizes.
On the other hand, rolled fondant is more dense, and it has a different texture, appearance, and purpose. As in fondant icing, the main ingredient of rolled fondant is sugar, however, there are some other ingredients in it. Also, the techniques are quite different. Instead of cooking sugar syrup like for fondant icing, rolled fondant calls for blooming gelatin, and heating it gently on bain-marie until it dissolves. Melted gelatin is added to powdered sugar along with glucose and glycerin and kneaded until the mixture becomes dough-like.
How to Use Rolled Fondant?
Coloring Fondant
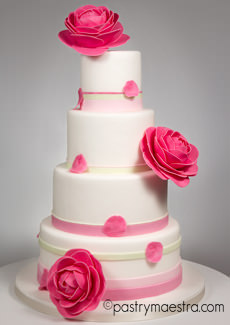
Fondant can also be painted with edible colors. There are many colors available: powdered colors, liquid colors, glitters, dusts, etc. However, in order to make perfectly colored fondant, you should know a few things about edible colors first. In this post I will not teach you everything about food colors, I will only explain the usage of colors regarding fondant.
There are two main types of edible colors: water soluble and fat soluble. To color your fondant, you will need water soluble colors. I have tried lots of different type of colors, but I find gel colors most suitable for my needs. Liquid colorings will spill all over your fondant, and they don’t have strong pigments – you will need to put more coloring, and it will soften your fondant. On the other hand, powdered colorings are too dry, and if you don’t melt them in some water before coloring your fondant, you won’t get uniform color. That is the reason I prefer gel colors; it is easy to control the quantities of the coloring, especially if you are using the ones in tubes. You need to apply a small quantity of the gel coloring on your fondant, and knead until the color of fondant becomes uniform, repeating the process until you are happy with the result. Once you are done with the coloring, it is time for decorating!
Covering Cakes
A cake has to be prepared properly in order to be covered with fondant – it should be masked with ganache or buttercream and well chilled. Smoother the cake is before covering, better it will look when done. When the cake is ready, it is time to roll out the fondant as even as possible. Ideally, fondant should be 2-3mm (1⁄12 – 1⁄8 inches) thick, but if you are a beginner, make it a bit thicker (say-5mm/ 3⁄16 inches) because it will be much easier to handle it (thin fondant breaks easily). Make sure you have enough fondant to cover the top and the sides of your cake! When you are happy with the thickness, roll your fondant on your rolling pin and unroll it onto the cake. Smooth the top with fondant smoother, and then work on the sides. A tip for beginners – buy a cake dummy (the small one will be quite handy) and practice the technique. It takes a lot of persistence, but eventually, your cakes will look neat and pretty.
How to Decorate with Rolled Fondant
You have successfully covered your cake. What now? Well, now think of your cake like an empty canvas of an artist! If you are not sure what to do, you can make a sketch first! Or, look for inspiration online, look at the photos of other’s cakes; decide what you like and how you want your cake to look like. You can make three-dimensional decorations using only your hands, simple fondant tools and your creativity. On the other hand, there are loads of decorating tools to help you with your creations!
I will give you a piece of advice – you don’t need all of those! For starters, a few essentials will be just fine, and when you learn and master how to work with those, start expanding your collection.
This is your starter kit:
- Rolling pin
- Fondant smoother
- Pizza cutter or fondant trimmer
- Modeling tools
- Ribbon cutter
- Letters & numbers
- Fondant flowers & butterflies
- Flower forming cups
- Fondant shaping foam
- Ball tool
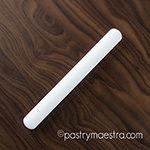
You probably already have a wooden rolling pin. However, a plastic rolling pin is nice and smooth, and so easy to clean.
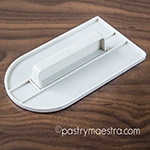
This flat, plastic thingy is a cake decorator’s must! When you cover your cake, use fondant smoother to smooth the top and the sides of your cake. With this tool, all your cakes are going to be nice and smooth.
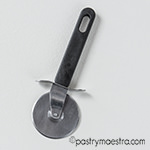
When you are done with the smoother, carefully trim off the excess fondant using a pizza cutter or fondant trimmer.
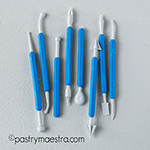
When you are trying to make a small decoration for your cake, a flower or a figurine, your fingers are going to be too big and clumsy. You will need modeling tools.
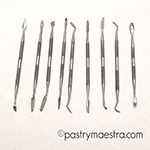 There are plastic modeling tools designed specially for fondant, however, I really like my metal dentist/carving tools – they are firmer (hard to break), they have lots of different forms, and they are more precise than the plastic modeling tools.
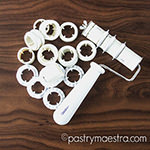
You can use fabric ribbons to decorate your fondant cake. However, if you want to make a 100% edible cake, you will have to learn how to make fondant ribbon and bow, and you will find this tool most helpful!
Lots of clients like their cake to have some kind of an inscription, depending on the occasion, or maybe a number, if you are, for example, making a birthday cake. Fondant nimbers and letters cutters will help you make regular and neat letters and numbers, and if you make them a bit thicker, you can dry them out and stack them on top of your cake!
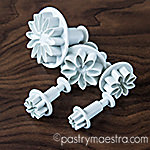
I usually don’t like buying predefined sets, because whenever I buy one, I never use everything in that set.
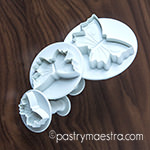 So I try to look for individual cutters and molds – just the ones I need. However, this sets are just great, you can make simple and beautiful flowers and butterflies in a jiffy!
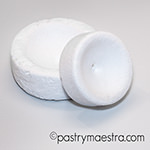
I love these styrofoam flower forming cups! They are handy, lightweight and easy to handle!
Fondant shaping foam is essential to thin out your flowers without breaking your fondant! You have to cut out your petals thinly first, and then put each petal on this mat. Finally, you will thin the edges of your petals using ball tool.
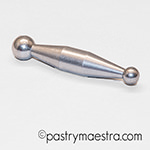
Last, but not least – the ball tool. I use mine almost every day, and I love it! If you decide to purchase one, be careful not to buy the ball tool with a thin handle. Buy something like this, on the photo, your hand will be grateful, trust me!
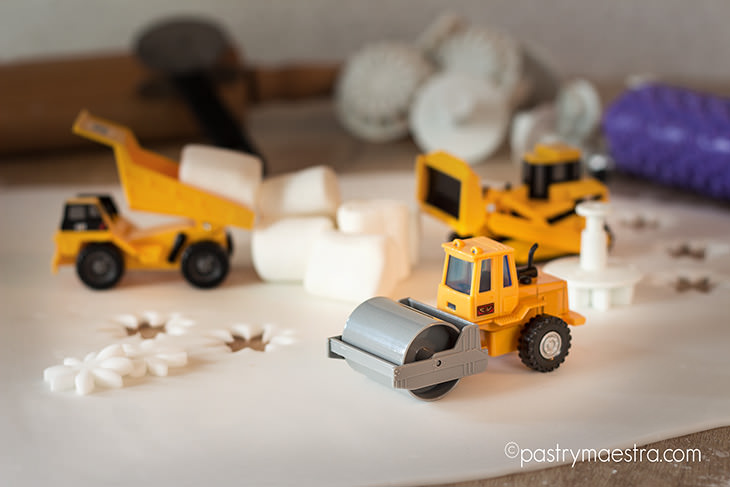
So…I guess it’s time to fire up that ol’ steam roller, dump some marshmallows and – start rollin’! Roll, roll, roll…and tell me honestly – isn’t it awesome to play with that edible clay? Isn’t it?!
How to Make Rolled Fondant?
There are loads of recipes for making rolled fondant throughout the internet. Some include lots of powdered sugar, gelatin, and glycerin while other, also very popular recipes call for marshmallow candy, powdered sugar and some butter or vegetable shortening. Since marshmallow fondant is super easy and quick to make, I am sharing my favorite recipe with you.
Marshmallow Fondant Recipe
by:Tereza Alabanda,The Pastry Maestra
PRINT PDF (EN) ISPIŠI PDF (HR)Prep. time : 10 minutes
Ready in 10 minutes
Level : Basic
Ingredients:- Marshmallows 150g (5.3oz)
- Water 25ml (1.5Tbsp)
- Powdered sugar 300g (10.6oz)
- Put marshmallows and water into a bowl and microwave it on low heat for 5-10 seconds. Stir and repeat until everything is melted.
- Add powdered sugar. Stir the mixture with a wooden spoon greased with some butter or shortening until incorporated.
- Put the marshmallow and sugar mass on the counter and knead it until uniform. If the mixture is too sticky, add some more powdered sugar. You can grease your hands and counter with some shortening if you don’t want to add more sugar.
- Seal the fondant in an airtight bag or wrap it in plastic foil and leave it to rest overnight.
Copyright© PastryMaestra.comTM
Well, what do you think about this post?
Please leave your comment on YouTube, thank you!
I read and really appreciate all the comments, even though I do not always have the time to respond to each one. So – keep me in the loop and try to create some sweetness every day because – Sweetness is happiness!!


