O
ne thing that always takes my breath away is a display of those perfect French-style decorated entremets [ɑ̃tʁəmɛ] (for modern pastry chefs, an entremet is a multi-layered mousse-based cake with various complementary flavors and varying textural contrasts)! That glossy glaze and delicate chocolate piping on the top, ah, be still my heart! Beautiful and frightening at the same time, particularly when you remember that, as a culinary academy student you have to do that yourself, isn’t it? I remember well that British summer day at Le Cordon Bleu when chef ordered me for the first time to write directly on a cake with melted chocolate, just like that, without warning! In panic, I was holding the cornet [koʁ.ne] above the glossy glaze and the only thought that was spinning in my mind was: “What if I mess up?!” And, of course, I messed up!
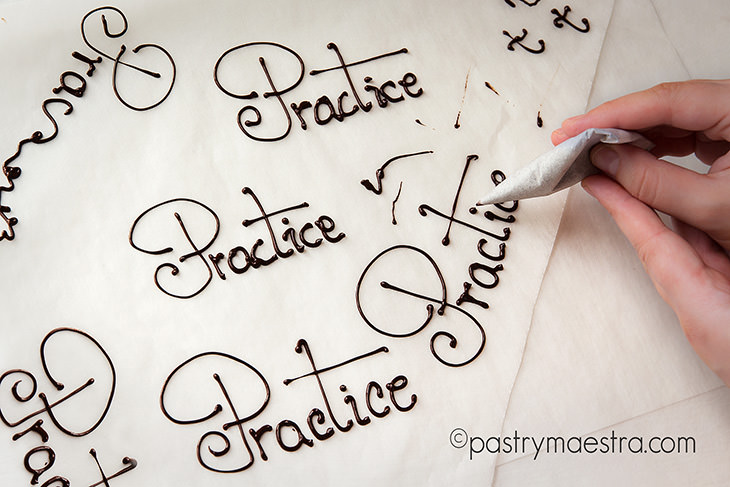
Long story short – after I had cried a small lake, I spread the parchment paper sheets all over the kitchen, melted some chocolate, and starting practicing! The point of my story? Less talking, more piping!
How to melt chocolate?
In order to pipe with chocolate successfully, it is very important to melt the chocolate properly. What does that mean? Well, there are two easy ways to melt your chocolate.
Bain-Marie Method
One way is to do it in a bain-marie, also called double boiler. Fill a large pan with water halfway and put it on the stove. Chop your chocolate and put it in a heatproof bowl. Put the bowl into a pan filled with simmering water, the water shouldn’t boil! You should stir your chocolate frequently until it melts, and as soon as it melts, take the bowl out from the pan.
Be very careful that the water or the steam from the pan doesn’t get into the chocolate, because that will cause the chocolate to “seize up”. If even one drop of water ends up in your chocolate, it will become hard and lumpy. Remember, chocolate contains cocoa solids, sugar, cocoa butter and (in some cases) powdered milk – meaning solids and fat. There is no water in the chocolate! So, when a drop of water ends up in mixture of solids and fat, the solids quickly absorb the water and that mixture separates from the fatty cocoa butter. You can “save” your chocolate by adding some more warm water, cream or vegetable oil and mixing. You actually have to make an emulsion. You can use this mixture for piping, making chocolate ganache, sauce etc. However, don’t try to make tempered chocolate decorations or chocolate bonbons with it!
Microwave Method
You can also melt your chocolate easily in the microwave. Put chopped chocolate into a bowl and microwave it on medium power in 20-second intervals. After each interval, take the bowl with the chocolate out and stir well, to even the temperature inside of the bowl. When your chocolate is almost melted, and it still contains only small chocolate bits, don’t put it in the microwave again. Just continue stirring the chocolate and it will become completely melted very quickly.
If you overheat your chocolate, it will form lumps, and you will have a hard time piping it because the lumps will get stuck into your piping cone. Be extra careful with the white chocolate, since it is even more delicate than the dark one, because it contains lots of powdered milk and sugar.
Making a Cornet – a Parchment Paper Cone
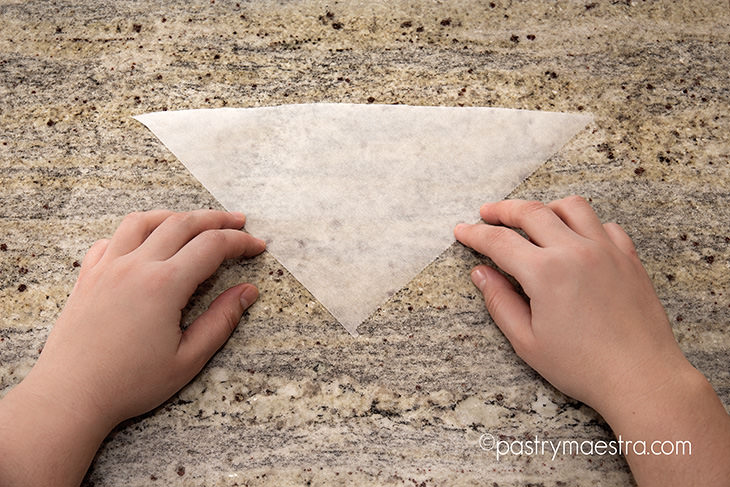
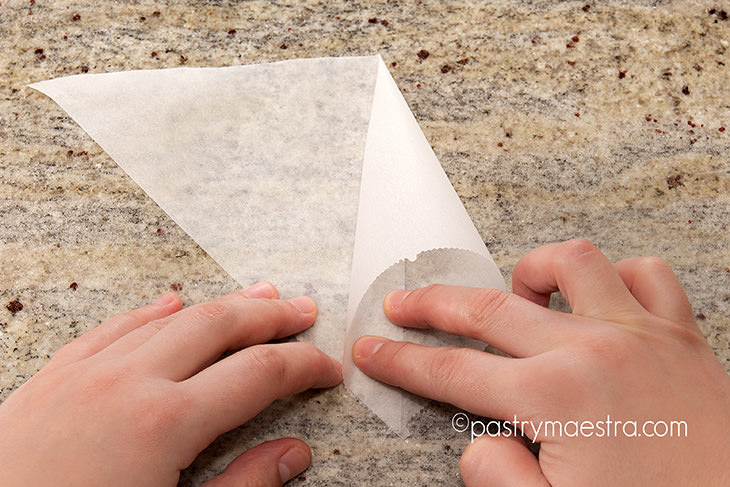
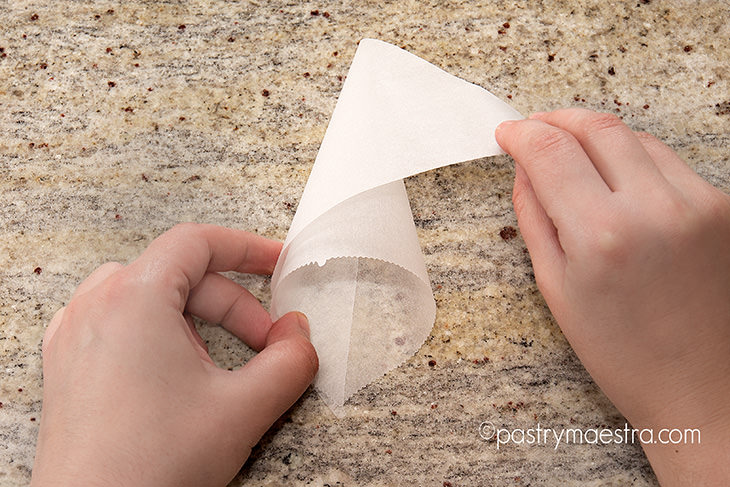
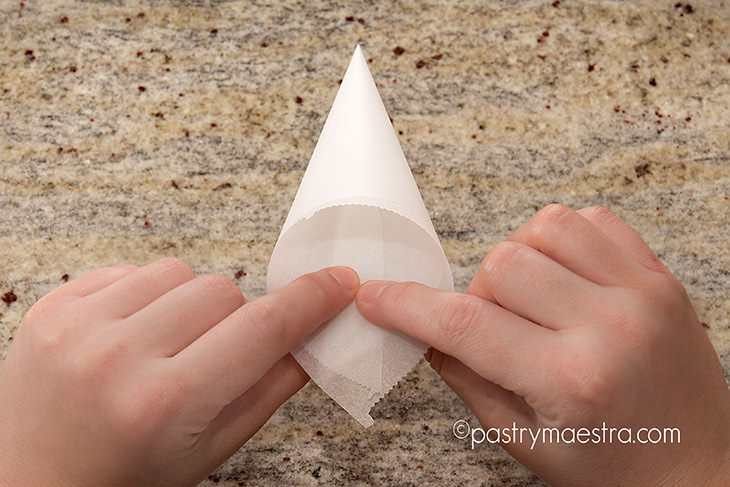
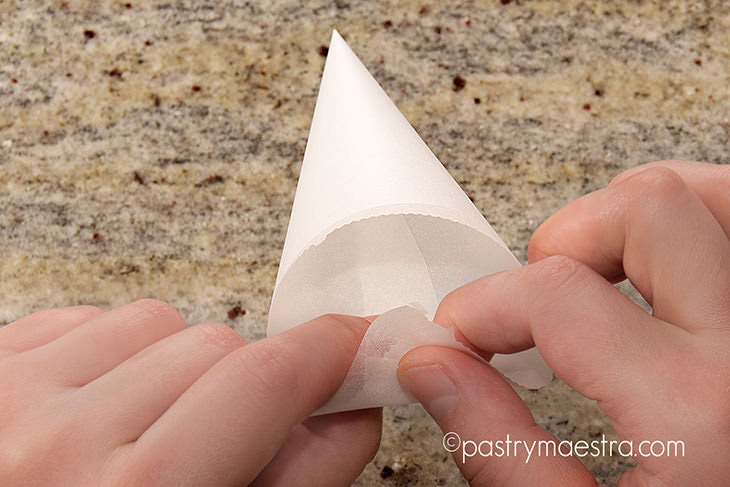
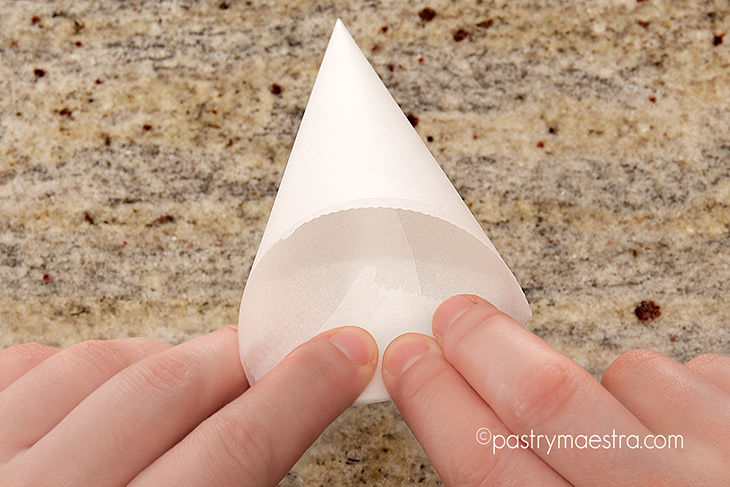
It is not that difficult, believe me! Take the parchment paper and cut out a triangle. It will be easier if your paper isn’t already rolled, so buy sheets rather than the rolled one. And for the laziest ones there are already cut triangles of parchment paper, I just wish I could buy these in Croatia!
Also, make sure that the tip of the cone isn’t open when you make it. It must not have a hole, because when you fill the cone with chocolate, the chocolate will start dripping immediately, and you won’t be able to make a nice, small cut. So, when you cut the tip that is already open, your chocolate will pour from the cone in thick stream, and your piping won’t be fine and delicate as it should be.
So, it goes like this:
How to Pipe with Melted Chocolate
You have successfully melted your chocolate and made your paper cone, so what now? Well, now you should fill your cone with melted chocolate, so it is one-third full and fold the open side of the cone as you would do with a letter to avoid overflow.
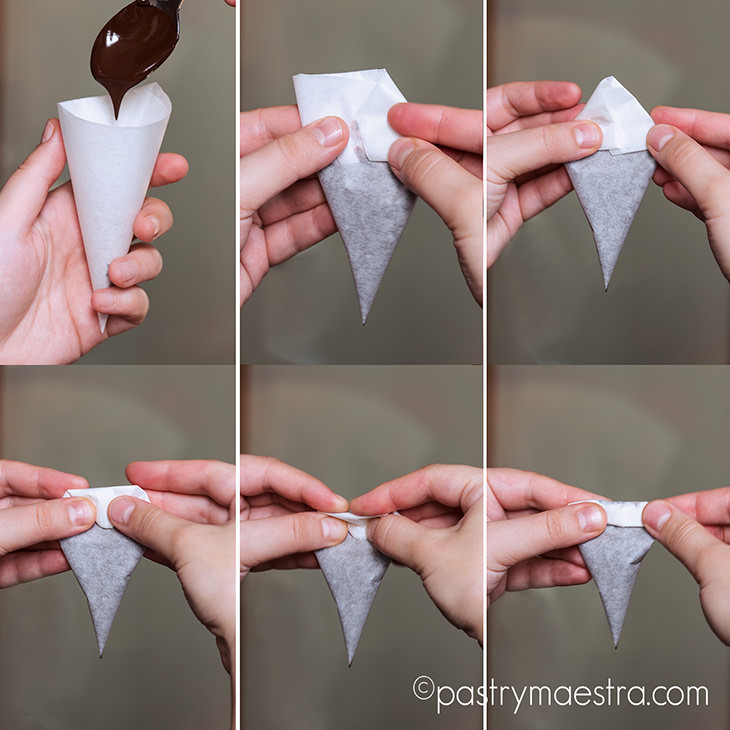
Snip off the tip of the cone with scissors and you can start piping. Make sure you make a small hole. Remember, you want your piping to be thin and delicate!
For the beginners, I recommend piping on a piece of parchment paper to get the feel. Hold your cone with one hand and use the other one as a guide. Make slow and controlled moves, stop shaking, do not squeeze the cone too eagerly, the gentle pressure will be sufficient and just let the gravity do the work.
And practice, practice, practice…
