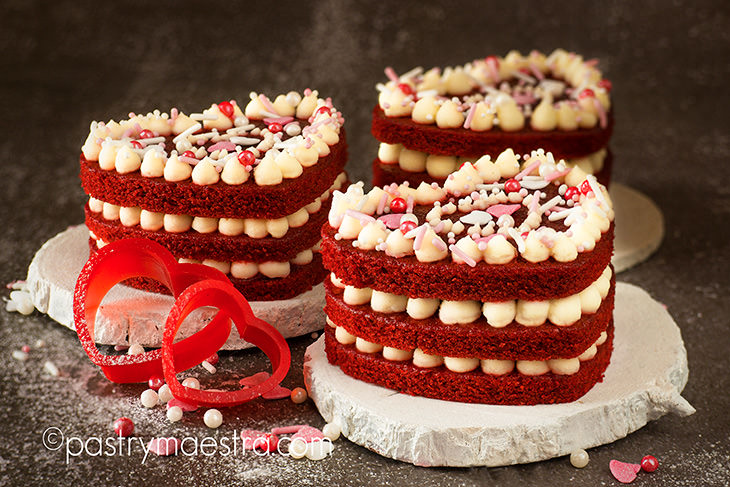
R
ed velvet cake is traditionally a red, red-brown, crimson or scarlet-colored chocolate layer cake. Originally, at least that is what I’ve learned on the internet, traditional recipes did not use food coloring, and the reddish color came from non-Dutched, anthocyanin-rich cocoa. Dutch what and antho-what a what, you say??
Well, let me explain. You see, the cocoa bean processing comes in two varieties – so-called “Broma process” and “Dutch process”. Broma process is a method of extracting cocoa butter from roasted cocoa beans that consists of hanging bags of roasted cocoa beans in a very warm room, above the melting point of cocoa butter (slightly above room temperature), and allowing the cocoa butter to drip off the beans, where it is collected. After the Broma process is completed, the remaining dry cocoa beans are usually ground into cocoa powder.

The Dutch process adds an additional processing step to the Broma process whereby, after the cocoa butter has been drained off the beans, the beans are soaked in an alkaline solution to make them chemically neutral. And – there is the catch! You see, natural cocoa is fairly acidic, and it is the acid that reacts to the buttermilk and vinegar, which are main ingredients of the red velvet cake, creating a reddish hue. Now we come to anthocyanins! These are water-soluble pigments that, depending on their pH, may appear red, purple, blue or black. Food plants rich in anthocyanins are – for example, blueberry, raspberry, black rice, and – you guessed it – cocoa beans! So, as you can see, in order to get a reddish cake, you need a non-Dutched, anthocyanin-rich cocoa! Simple, right? Hahaha, yes, I know – this is anything but simple, since today all around the world, cocoa is processed the Dutch way, meaning – it is chemically neutral, and buttermilk and vinegar do not react with it. So – we use food colors to make our velvety red beauties!

Now,a few words about history. It seems that velvet cake is thought to have originated in Maryland early in the 20th century. Beginning in the 19th century, “velvet” cake, a soft and velvety crumb cake, came to be served as a fancy dessert, in contrast to what had been the more common, coarser-crumbed cake. Recipes called for the use of cocoa to soften flour and make finer texture cakes. This smoother texture gave these cakes the name “velvet” cakes. When foods were rationed during World War II, bakers in United States used boiled beetroot juices to enhance the color of their cakes. Nowadays – we use food colors simply because it is easy! Sure, you can cook beatroots and make your own color, but I will not do that today! Also, thanks to the food colors, our red velvet cakes can be really red – like – fire engine red, and we like that, don’t we? I sure do, so let me show you how to make some cute, heart-shaped (of course), red velvet Valentine’s Day cakes!

P.S. If you like heart shaped sweet treats, also check my Valentine’s Day chocolate and coconut heart shaped tart, coconut and raspberry Linzer cookies, hidden surprise white chocolate bark or cheesecake hearts with raspberry sauce! :)

Red Velvet Valentine’s Day Cake
by:Tereza Alabanda,The Pastry Maestra
PRINT PDF (EN) ISPIŠI PDF (HR)Prep. time : 20 minutes
Cook time : 15 minutes
Ready in 35 minutes
Level : Basic
Ingredients: Red Velvet Cake:- All purpose flour 120g (4.2oz)
- Sugar 135g (4.7oz)
- Cocoa powder 6g (1/2Tbsp)
- Baking soda 3g (1/2Tsp)
- Salt 1g (1/4Tsp)
- Buttermilk 160g (5.6oz) (or 150g milk mixed with 10g of lemon juice)
- Vegetable oil 80g (2.8oz)
- Apple cider vinegar 1/2Tsp
- Mascarpone cream cheese 150g (5.3oz)
- Sugar 30g (1oz)
- Vanilla powder
- Cream 35% 150g (5.3oz)
- Put lukewarm milk into a measuring cup, add lemon juice and stir to combine. Leave this at room temperature for about 15 minutes, until it curdles. You can use buttermilk instead of this mixture.
- Put sifted flour into another bowl. Add sugar, cocoa powder, baking soda, and salt and stir well with a whisk. Add curdled milk (or buttermilk) into the dry ingredients and stir well to combine. Add vegetable oil and apple cider vinegar and stir again. Finally add red gel coloring, and stir well with a whisk.
- Transfer the batter into 30cm x 30cm (12″x12″) pan lined with parchment paper. Distribute the mixture using a small spatula, and then bake the cake at 180°C (350°F) for about 15 minutes. Take it out and leave it to cool down completely.
- To make mascarpone cream put mascarpone cream cheese into a bowl. Add sugar and vanilla powder and stir well with a silicone spatula. Whip the cream in a stand mixer fitted with whisk attachment to soft peaks. Add whipped cream into mascarpone mixture and stir until combined.
- Cut out nine hearts out of cooled cake with a cookie cutter.
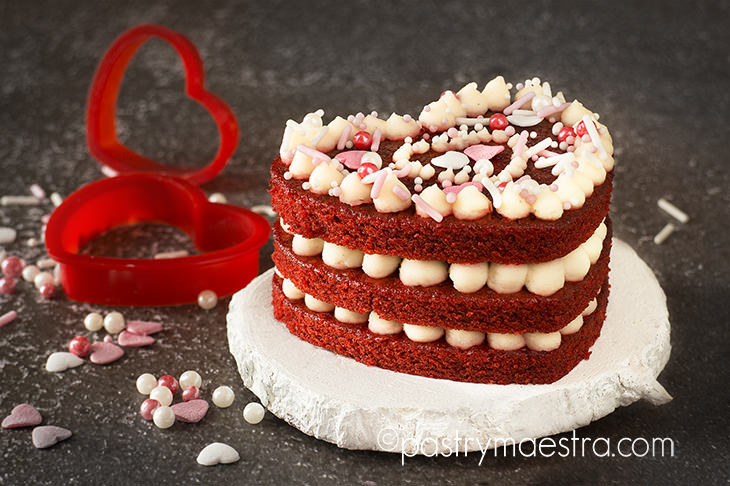
- Place one red velvet heart onto a plate. Put mascarpone cream into a piping bag fitted with plain 8mm (3/8″) tip and pipe the cream onto the cake. Cover it with another layer and repeat the procedure. Cover this with the final, top layer.
- To make it easier to pipe a small heart, make an imprint on the top layer using a small heart shaped cutter.
- Pipe blobs of cream along the edge of the cake. Then, using a piping bag fitted with 2mm (5/64″) tip pipe small blobs of cream, following the small heart shaped imprint. Finish the decoration with various sprinkles. Of course, you can use any form, color or shape you like, just let your imagination guide you.
- There, your delicious Red Velvet Valentine’s cake is done! Enjoy!
Copyright© PastryMaestra.comTM
Well, what do you think about this post?
Please leave your comment on YouTube, thank you!
I read and really appreciate all the comments, even though I do not always have the time to respond to each one. So – keep me in the loop and try to create some sweetness every day because – Sweetness is happiness!!


