H
ave you ever bought a chocolate bar or a chocolate bonbon, and when you impatiently opened the sweet package, you discovered an unappealing layer of something white on the surface of your supposed-to-be-pleasurable snack? And if you took a bite of that chocolate, it crumbled in your mouth in a kind of sandy way? Well, don’t worry, that chocolate bar wasn’t old or spoiled, and the white thing is not fungus, no – the problem is in a process called the ‘tempering’. To be absolutely clear – every chocolate manufacturer tempers the chocolate, but my example here describes the situation where already tempered chocolate was exposed to heat (say – in transport or because of inappropriate storage). When that happens, the chocolate melts, and that, my friends, is a huge no-no! Let me explain.
What is Tempering?
In order to make a beautiful, shiny chocolate bar or chocolate bonbons that will ‘snap’ loudly when eaten, it is crucial that the chocolate is tempered or pre-crystallized. I’ve already mentioned that “real”, good quality chocolate contains no other fat than cocoa butter. Cocoa butter is a fat that is extracted from cocoa beans, and it gives chocolate that unique mouthfeel – it is responsible for that “snap” when you bite into the chocolate, but it is also the reason why tempered chocolate melts divinely in your mouth. On the other hand, cocoa butter is also the main culprit why we have to temper the chocolate in the first place! Cocoa butter contains several types of crystals in its structure. When chocolate is melted, all the crystals become separated, and unstable. Each type of crystal becomes solid at different temperature. Process of cooling and reheating stabilizes the crystals, so when the chocolate sets, it becomes firm, glossy, and it doesn’t stick to molds. Also, the melting point of well tempered chocolate is higher than of untempered chocolate. The reason is – the crystals in cocoa butter are stable and well connected in well tempered chocolate, and it takes more heat to separate them. Untempered chocolate looks dull, it sticks to your fingers, you can bend it easily, and it never snaps. It can also have white specs on the surface (sugar bloom), or it can be streaked with gray lines (fat bloom). Not very appetizing, right? On the other hand, tempered chocolate is shiny, and its color is uniform. When you hold it, it doesn’t melt instantly, and it is firm, so when you break it, it has that lovely “snap” sound. Yummy!
When to Temper Chocolate?
You don’t need to temper chocolate if you want to make chocolate ganache tart or chocolate panna cotta. However, if you want to make for example chocolate decorations, tempering is a must! Make sure you have a good quality chocolate, because it will be much easier to temper it. Chocolate should contain cocoa solids, sugar, vanilla, powdered milk (if you are using milk or white chocolate), and cocoa butter. It shouldn’t contain any other fats but cocoa butter, so always read the labels! More cocoa butter the chocolate contains, it will be finer, more fluid when you melt it (higher in viscosity), and more expensive, too.
Three Steps of Chocolate Tempering
Pre-crystallizing or tempering consists of three steps:
Melting the Chocolate
First step is melting chocolate at a temperature between 40°C (103°F) and 45°C (113°F) for white and milk chocolate, and 45°C (113°F) to 50°C (122°F) for dark chocolate.
I’ve already explained how to melt chocolate, but I will also do that in this post. So, the main thing is that you should always melt your chocolate gently, and never on direct heat! You can do it in bain-marie, which is another name for double boiler, or in the microwave oven.
If you are melting chocolate in bain-marie, fill a large pan with water halfway and put it on the stove. Chop your chocolate and put it in a heatproof bowl. Put the bowl into a pan filled with simmering water, the water shouldn’t boil! You should stir your chocolate frequently until it melts, and as soon as it melts, take the bowl out from the pan.
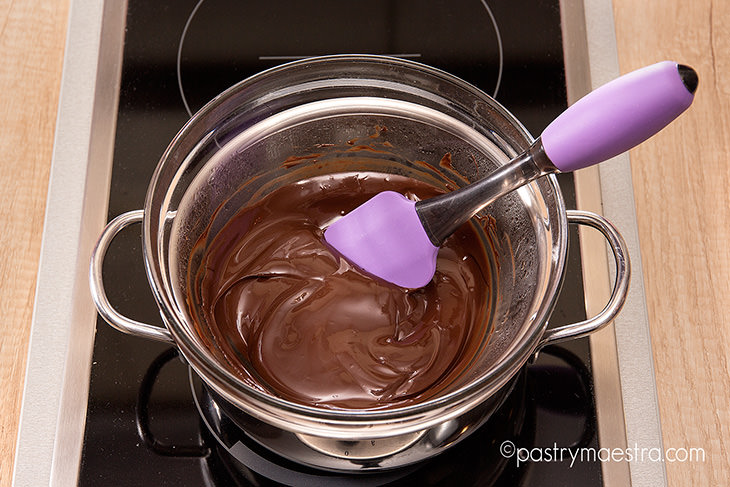 Be very careful that the water or the steam from the pan doesn’t get into the chocolate, because that will cause the chocolate to “seize up”. If even one drop of water ends up in your chocolate, it will become hard and lumpy. Remember, chocolate contains cocoa solids, sugar, cocoa butter and (in some cases) powdered milk – meaning solids and fat. There is no water in the chocolate! So, when a drop of water ends up in mixture of solids and fat, the solids quickly absorb the water and that mixture separates from the fatty cocoa butter.
You can also melt your chocolate easily in the microwave. Put chopped chocolate into a bowl and microwave it on medium power in 20-second intervals. After each interval, take the bowl with the chocolate out and stir well, to even the temperature inside of the bowl. When your chocolate is almost melted, and it still contains only small chocolate bits, don’t put it in the microwave again. Just continue stirring the chocolate and it will become completely melted very quickly.
Cooling the Chocolate
The second step is cooling the chocolate. The exact temperature depends on the type of chocolate you are tempering and it can vary from 26°C (79°F) for white and milk chocolate, to 27°C (80°F) for dark chocolate. It is important to “move” the chocolate while cooling, so you should stir your chocolate frequently at this stage.
Reheating the Chocolate
Third step is reheating at a temperature between 28°C (82°F) and 31°C (88°F). After reheating at exact temperature, chocolate is ready to use for making decorations, chocolate bonbons or chocolate sculptures. You should check the temperature of your chocolate every now and then, and reheat it if necessary. Be careful that you don’t raise the temperature above 32°C (90°F), because that way you will lose your temper, and you will have to start from the beginning.
How to Temper Chocolate?
There are several methods of pre-crystallizing chocolate:
Tabling Method
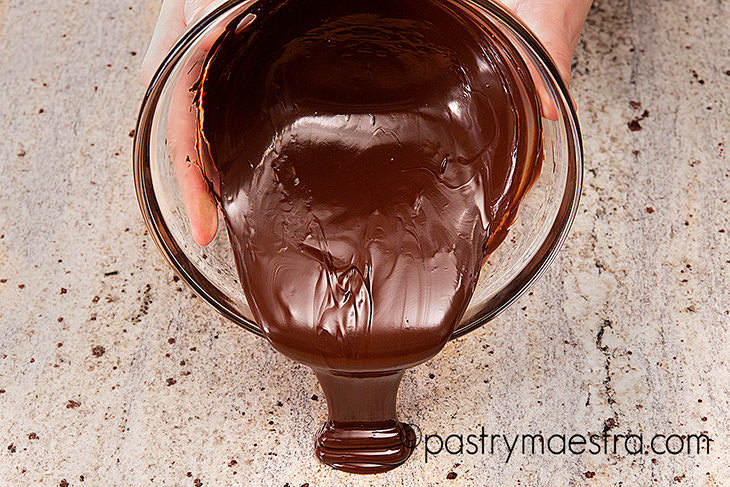
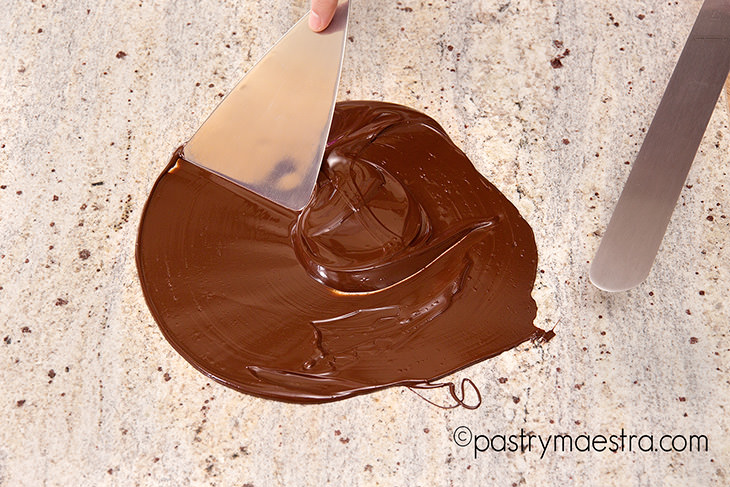
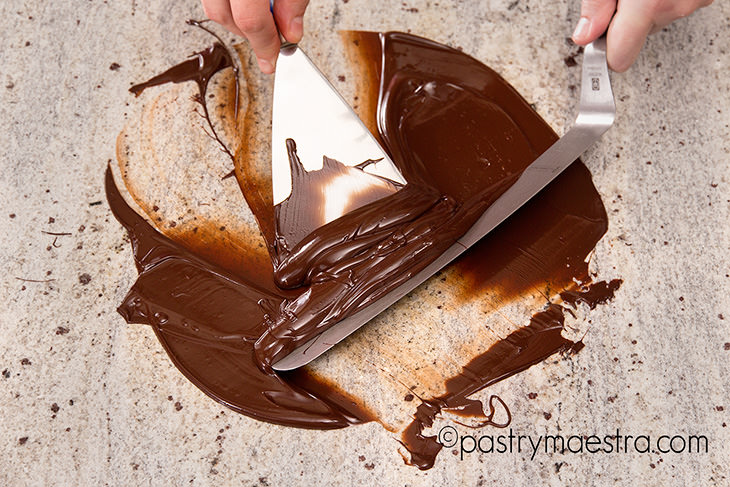
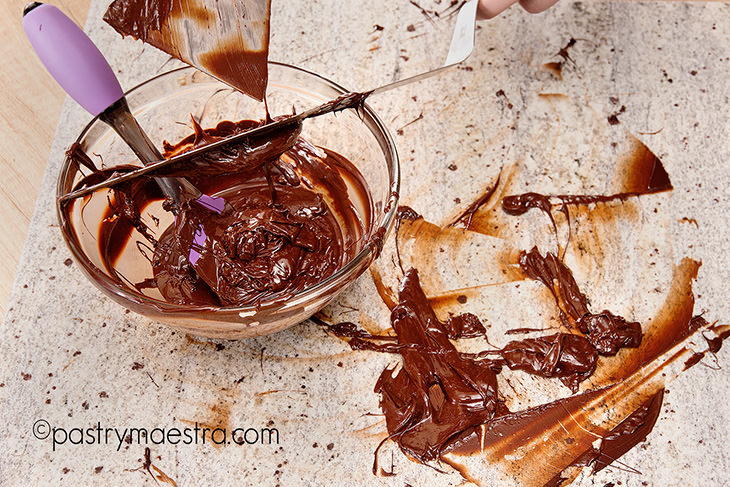
Melt the chocolate. Pour approximately two thirds of melted chocolate onto a marble slab, and work it with spatula by stirring and scraping until it cools down. Return the cooled chocolate into that one third that wasn’t cooled and stir to even the temperature.
Seeding Method
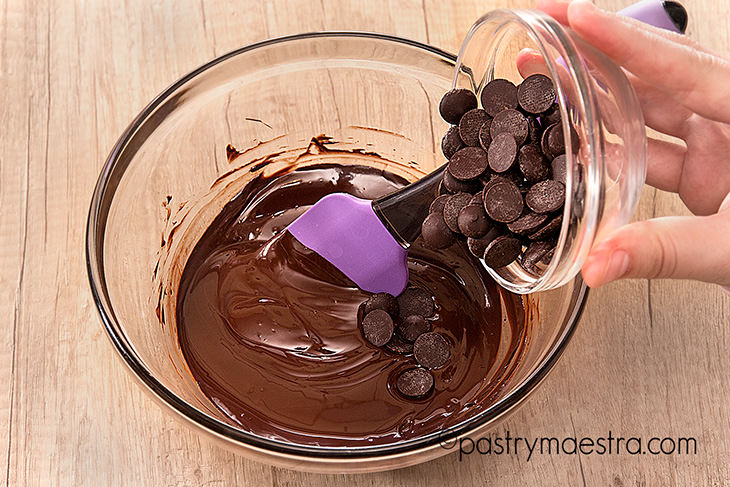
Melt two thirds of your chocolate over bain-marie. When it is fully melted and without lumps, add your remaining unmelted chocolate, cut into small pieces. Stir until all the chocolate melts and reaches working temperature.
Microwave Method
Put all the chocolate into a glass bowl and melt at low heat for 15 seconds. Take it out and stir well to even the temperature. Repeat the process until all the chocolate melts, but you should still have some small chocolate pieces visible. Stir until everything melts and thickens a bit.
Bain-marie method
Put all the chocolate into a bowl and melt it over bain-marie. When it is completely melted, take it out and put it in a cold bath – a bowl filled with cold water – for a few seconds. Take it out and stir well to even the temperature. Repeat until chocolate cools down to desired temperature. Then, put the bowl again into bain-marie for 3-5 seconds to re-heat the chocolate.
How do You Know that Chocolate is Tempered?
Well tempered chocolate:
- It sets quickly.
- It has a nice shine.
- When you take a bite, it snaps.
- It shrinks a bit in the mold.
- When you touch it, it doesn’t melt.
Poorly tempered chocolate:
- Has a dull appearance.
- It doesn’t have a snap, it is chewy.
- It might have a “fat bloom” or “sugar bloom” – stripes of unappealing white-ish traces on the surface of the chocolate.
- It sets slowly, and it actually never sets like tempered chocolate does.
- When you touch it, it melts instantly.
Now, do you remember our unappealing chocolate from the beginning? Well, if you buy a perfectly well tempered chocolate bar and you leave it in the sun, and after the chocolate melts, you put it into the fridge, you will end up with that same result – a dull, easy-melting, chewy chocolate bar. To restore it to its previous glory – just temper it, now you know how! Bonne chance!
Well, what do you think about this post?
Please leave your comment on YouTube, thank you!
I read and really appreciate all the comments, even though I do not always have the time to respond to each one. So – keep me in the loop and try to create some sweetness every day because – Sweetness is happiness!!


